Blog Details
- Home
- Blog Details
How to Check a Plumbing Trap Primer and Prevent Dry Drain Smells
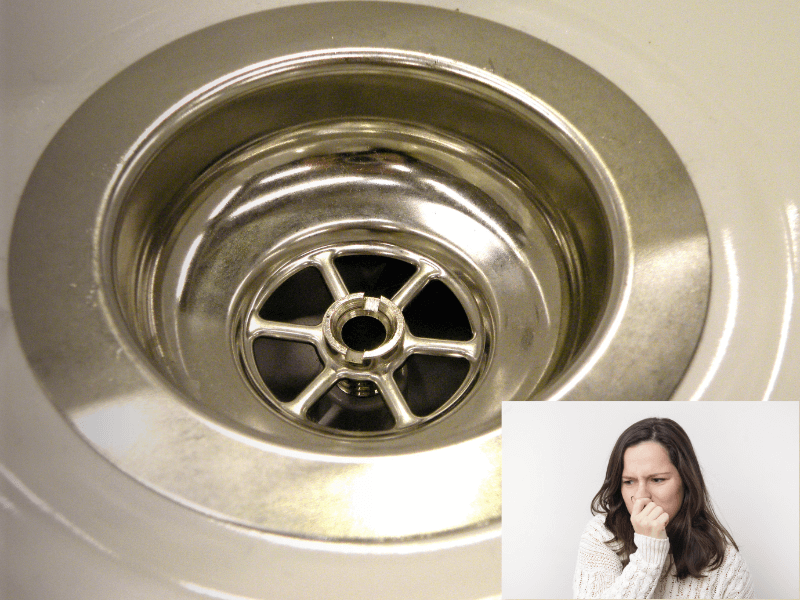
Have you ever noticed a foul odor coming from your drains, even when your sinks or showers aren’t being used frequently? That unpleasant smell is often caused by dry plumbing traps, and one of the most effective solutions is the plumbing trap primer. Trap primers are designed to keep water in your P-traps, preventing sewer gases from entering your home.
At Saint Pete Plumbing, we often encounter homeowners dealing with these issues, and with proper maintenance and inspection, you can prevent dry drain smells and maintain a healthy, odor-free plumbing system. This step-by-step guide will explain what trap primers are, how to check them, and how to prevent dry drain odors.
What is a Plumbing Trap Primer?
To understand a plumbing trap primer, it’s helpful to first know what a P-trap is. A P-trap is the curved section of pipe under sinks, showers, and floor drains. It retains water, forming a seal that blocks sewer gases from coming up into your home.
Over time, if a fixture isn’t used regularly, the water in the P-trap can evaporate, allowing foul odors to escape. This is where a trap primer comes in.
A plumbing trap primer is a device or system that automatically adds water to P-traps when needed. By keeping traps filled, it maintains a continuous water seal, preventing unpleasant smells and protecting your home from potentially harmful sewer gases.
Trap primers are commonly used in:
👉Floor drains in basements, commercial buildings, and laundry rooms
👉Shower and bathtub drains in guest bathrooms
👉Sinks in infrequently used areas
Signs That Your Trap Primer Needs Checking
Understanding when your trap primer is malfunctioning is key to preventing dry drain smells. Here are common warning signs:
1. Persistent odors from drains: If your drains smell even after cleaning, it may indicate dry traps.
2. Frequent drain blockages: Sometimes, a dry trap allows debris or pests to enter the drain, causing clogs.
3. Water pooling irregularities: Trap primers ensure consistent water levels. If the water level seems too low, the primer may be faulty.
4. Visible corrosion or leaks: Over time, primer connections can corrode or leak.
Pro tip: Not all smells are caused by dry traps. Sometimes the issue is a venting problem or a clogged drain. A professional inspection can pinpoint the root cause.
Tools and Materials Needed to Check a Trap Primer
Before checking or servicing a trap primer, gather the necessary tools:
Tools:
✔Flashlight
✔Screwdriver or nut driver
✔Adjustable wrench or pliers
✔Bucket or towel for water spills
Materials (optional, depending on issue):
✔Replacement trap primer
✔Plumber’s tape
✔Silicone sealant
Note: Some trap primers are mechanical, while others are automatic, connected to water supply lines. Understanding your system is essential before attempting repairs.
Step 1: Locate the Trap Primer
Trap primers are usually installed near the fixture they serve or connected to the main water line. Common locations include:
✔Near floor drains
✔Under sinks or behind cabinets
✔Integrated into the shower or toilet supply line
Once located, visually inspect the primer for:
✔Corrosion or rust
✔Loose fittings
✔Water leaks
✔Mineral buildup
Tip: A flashlight helps spot subtle signs of damage, especially in hard-to-reach areas.
Step 2: Inspect the Water Supply Line
Trap primers require a consistent water supply to function. Check the supply line by:
✔Ensuring the shut-off valve is fully open.
✔Checking for kinks or blockages in the line.
✔Inspecting for leaks at connection points.
If you notice leaks, tighten fittings with an adjustable wrench. Avoid overtightening, as this may damage the primer or piping.
Step 3: Test the Primer Function
Testing a trap primer ensures it is properly filling the P-trap. The process depends on the type of primer:
Manual or mechanical primers:
Some primers are activated by foot or lever. Depress the lever and observe if water flows into the trap.
Automatic primers:
✔These devices typically fill the trap periodically or when water flow is detected elsewhere in the system.
✔Carefully remove the cover and observe the mechanism. Turn on the supply briefly to see if water flows into the trap.
Safety tip: Place a bucket or towel under the trap to catch any water during testing.
Step 4: Check the P-Trap Water Level
Once the primer has operated, check the water level in the P-trap.
✔Remove the access cap or use a flashlight to inspect.
✔The trap should be filled approximately halfway, enough to form a seal.
✔If the water level remains low, it may indicate a malfunctioning primer, a leak in the trap, or evaporation due to infrequent use.
Pro tip: Regularly flushing infrequently used drains helps maintain water levels even without a trap primer.
Step 5: Clean and Maintain the Primer
Mineral deposits and debris can affect trap primer performance. Here’s how to clean it safely:
✔Turn off the water supply.
✔Remove the primer from its mount.
✔Soak any removable parts in white vinegar to dissolve mineral buildup.
✔Rinse thoroughly and reinstall.
✔Check for leaks after turning the water back on.
Regular maintenance every 6–12 months keeps trap primers functioning efficiently.
Step 6: Replace a Faulty Trap Primer
If inspection or testing reveals a defective trap primer, replacement is necessary.
✔Turn off the water supply.
✔Disconnect the primer from the water line and P-trap.
✔Install the new primer according to the manufacturer’s instructions.
✔Reconnect supply lines using plumber’s tape for a secure, leak-free seal.
✔Test the new primer to ensure proper operation.
Using the correct replacement model is crucial, as trap primers vary by fixture type and water pressure requirements.
Additional Tips to Prevent Dry Drain Smells
While trap primers are effective, additional preventive measures can further protect your plumbing system:
1. Regularly run infrequently used fixtures: Simply running water through sinks, showers, and floor drains once a week keeps traps filled.
2. Pour water directly into unused drains: For very infrequently used drains, adding a gallon of water occasionally can prevent evaporation.
3. Add mineral oil to slow evaporation: A thin layer of mineral oil on the trap water surface can reduce evaporation and maintain the seal.
4. Inspect venting systems: Proper venting prevents negative pressure, which can siphon water from traps.
5. Seal cracks in fixtures or floors: Leaks or gaps can allow odors to escape even if the trap is full.
Tip from our experts: A combination of trap primers and good maintenance practices ensures a consistently odor-free environment.
Common Questions About Trap Primers
Q: Can I install a trap primer myself?
A: Yes, many homeowners can install simple mechanical primers. For automatic or integrated systems, professional installation is recommended.
Q: How often should I check a trap primer?
A: Inspect every 6–12 months or if you notice odors or low water in the traps.
Q: Can a trap primer prevent all drain odors?
A: Trap primers are effective for dry traps, but odors can also come from clogged drains, venting issues, or sewer line problems.
Q: What if my building has multiple unused drains?
A: Multi-drain systems may require multiple trap primers or an automatic system that services several traps simultaneously.
When to Call a Professional
While checking and maintaining a trap primer can be a DIY task, certain situations require expert plumbing services. Call Saint Pete Plumbing if:
✔ Trap primers are malfunctioning despite regular maintenance
✔ You notice persistent odors after flushing drains and testing primers
✔ Your plumbing system is complex or involves multiple floor drains
✔ You suspect venting issues or sewer line problems
Our licensed plumbers provide comprehensive inspections, trap primer installation, and odor prevention solutions to keep your home safe and fresh.
Conclusion
A properly functioning trap primer is essential for preventing dry drain smells and maintaining a healthy plumbing system. By regularly inspecting, testing, and maintaining your trap primers, you can ensure your P-traps remain filled, preventing unpleasant odors from entering your home.
At Saint Pete Plumbing, we emphasize preventive maintenance to avoid costly repairs and maintain a comfortable, odor-free living environment. Whether you need assistance checking your trap primers, replacing faulty units, or addressing complex plumbing issues, our team is here to provide reliable, expert solutions.
Remember: an ounce of prevention is worth a pound of cure—regular maintenance today saves headaches tomorrow.
Saint Pete Plumbing is proud to serve homeowners in St. Petersburg and surrounding areas with top-notch plumbing services. From trap primer inspections to comprehensive plumbing maintenance, we combine expertise, professionalism, and quality workmanship to ensure your home’s plumbing system is functioning optimally.
📞 Call Saint Pete Plumbing at (727) 800- 7667
🌐 Book Your Appointment Online at – www.saintpeteplumbing.com
📍 Serving All of St. Petersburg, Gulfport, and Pinellas County
Recent Posts
Recent Comments
Categories
- Aerobic Septic Tank
- appliance
- Bathroom
- Bathroom Plumbing
- Burst Pipe
- Commercial Plumbing
- Dishwasher
- Drain Cleaning
- Drain Heater
- Emergency Plumbing
- Faucet
- flood
- Garbage Disposal
- Garden Hose
- Home Water Pressure
- house clean
- Leak Repair
- Low Water Pressure
- New Home Plumbing
- pipe repair
- Plumbing
- Plumbing Checklist
- Plumbing Services
- Plumbing Tips
- Residential Plumbing
- Restoration
- Septic Tank
- Sewage
- Sewer Backup
- Shower
- Shower Cartridge
- Sump Pumps
- Thermostatic
- Toilet
- Toilet Seal
- Toilet Tank
- Trap Primer
- Vent Pipes Plumbing
- video inspection
- Water Heaters
- Water Softening
Tags
- 24 hour commercial plumbing
- 24 Hour Emergency
- 24 hour faucet installation st petersburg
- 24 Hour Plumbing Services
- 24 hour residential plumbing
- affordable solutions
- Appliance Repair
- appliance repair and installation
- appliance repair service
- Appliance Repair St. Petersburg
- Best Water Damage Restoration
- Build
- Clean
- clean water
- clogged drain
- Commercial Plumbing
- Commercial plumbing services
- Design
- Dishwasher Installation
- Drano doesn't work
- Emergency Flood Damage Repair
- faucet installation
- Faucet Installation Cost Guide
- faucet repair
- Fix Leaky Faucet
- Flood Restoration
- Florida Sewage Backup
- Frozen Pipe
- Frozen Pipe Repair
- Garbage Disposal Plumbing
- Garbage Disposal Repair
- Garden Hose Leaking
- Garden Hose Repair
- How to fix a leaking hose pipe
- installation
- leaky faucet in St. Petersburg
- low water pressure
- Low Water Pressure and Dripping Faucets
- Pipe Repair
- pipe Replacement
- Plumber in Pinellas Park FL
- Plumber in St. Petersbur
- Plumbers St. Petersburg
- Plumbing Services
- plumbing services in Pinellas
- Plumbing Video Camera
- prevention services
- Re-Piping
- Repair
- Residential Plumbing
- residential plumbing services
- Restoration Contractors
- Roof
- Rooftop
- Services
- Sewage Backup Cleanup
- Sewage Cleanup Services
- Sewer Camera Inspection
- Softening & Filtration Systems
- St Petersburg Restoration Services
- Sump Pump Installation
- sump pump repair
- Sump Pumps
- Toilet Repair
- Trenchless pipe repair
- Underground pipe relining
- Underground Pipe Repair without Digging
- video inspection camera
- Washing Machine Repairs
- water damage restoration
- Water Extraction
- Water removal & extraction
- Water Softening
Popular Feeds
Get In Touch
Tags
- 24 hour commercial plumbing
- 24 Hour Emergency
- 24 hour faucet installation st petersburg
- 24 Hour Plumbing Services
- 24 hour residential plumbing
- affordable solutions
- Appliance Repair
- appliance repair and installation
- appliance repair service
- Appliance Repair St. Petersburg
- Best Water Damage Restoration
- Build
- Clean
- clean water
- clogged drain
- Commercial Plumbing
- Commercial plumbing services
- Design
- Dishwasher Installation
- Drano doesn't work
- Emergency Flood Damage Repair
- faucet installation
- Faucet Installation Cost Guide
- faucet repair
- Fix Leaky Faucet
- Flood Restoration
- Florida Sewage Backup
- Frozen Pipe
- Frozen Pipe Repair
- Garbage Disposal Plumbing
- Garbage Disposal Repair
- Garden Hose Leaking
- Garden Hose Repair
- How to fix a leaking hose pipe
- installation
- leaky faucet in St. Petersburg
- low water pressure
- Low Water Pressure and Dripping Faucets
- Pipe Repair
- pipe Replacement
- Plumber in Pinellas Park FL
- Plumber in St. Petersbur
- Plumbers St. Petersburg
- Plumbing Services
- plumbing services in Pinellas
- Plumbing Video Camera
- prevention services
- Re-Piping
- Repair
- Residential Plumbing
- residential plumbing services
- Restoration Contractors
- Roof
- Rooftop
- Services
- Sewage Backup Cleanup
- Sewage Cleanup Services
- Sewer Camera Inspection
- Softening & Filtration Systems
- St Petersburg Restoration Services
- Sump Pump Installation
- sump pump repair
- Sump Pumps
- Toilet Repair
- Trenchless pipe repair
- Underground pipe relining
- Underground Pipe Repair without Digging
- video inspection camera
- Washing Machine Repairs
- water damage restoration
- Water Extraction
- Water removal & extraction
- Water Softening

Categories
- Aerobic Septic Tank
- appliance
- Bathroom
- Bathroom Plumbing
- Burst Pipe
- Commercial Plumbing
- Dishwasher
- Drain Cleaning
- Drain Heater
- Emergency Plumbing
- Faucet
- flood
- Garbage Disposal
- Garden Hose
- Home Water Pressure
- house clean
- Leak Repair
- Low Water Pressure
- New Home Plumbing
- pipe repair
- Plumbing
- Plumbing Checklist
- Plumbing Services
- Plumbing Tips
- Residential Plumbing
- Restoration
- Septic Tank
- Sewage
- Sewer Backup
- Shower
- Shower Cartridge
- Sump Pumps
- Thermostatic
- Toilet
- Toilet Seal
- Toilet Tank
- Trap Primer
- Vent Pipes Plumbing
- video inspection
- Water Heaters
- Water Softening
Get In Touch